CP2104 configuration & programming

前回つまづいてしまった CP2104 への書き込み処理のつづきです。
TOC
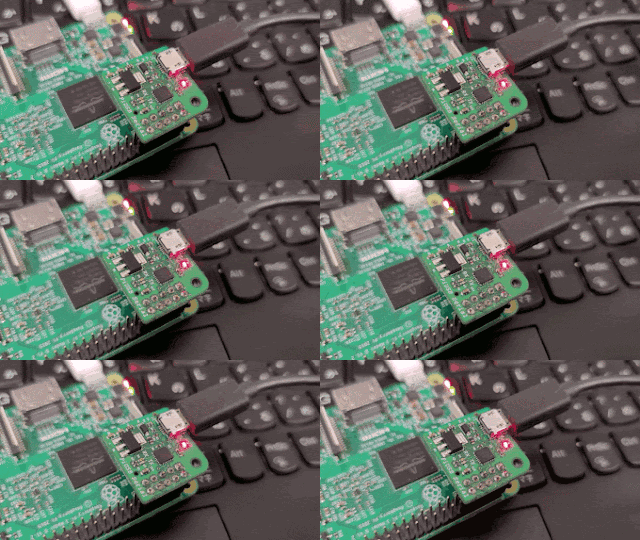
無事 LED TX/RX は点灯するようになりました。基板には問題なく CP2104 の設定を書き込むだけでした。
参考にした資料は以下です。
https://www.silabs.com/documents/public/application-notes/AN721.pdf
この資料を元に行った作業を書いていきます。
Simplicity Studio のインストール
Silicon labs のオフィシャルサイトに紹介されています。
https://www.silabs.com/developers/simplicity-studio
ここより Simplicity Studio インストーラーをダウンロードします。インストーラーを実行するだけ無事にインストールできます。Windows10, Mac, Linux 版揃ってるようです。私は Linux 版しか使用していませんが実行環境によっては動作しない場合があると思います。しっかりとサポートされているディストリビューションを使うと良いでしょう。
インストールした後は、README.txt に記述がありますが、setup.sh を root で実行する必要があります。デスクトップエントリや udev rules ファイルが配置されます。
$ cd ${SIMPLICITY_HOME}

$ sudo ./setup.sh
実行します。

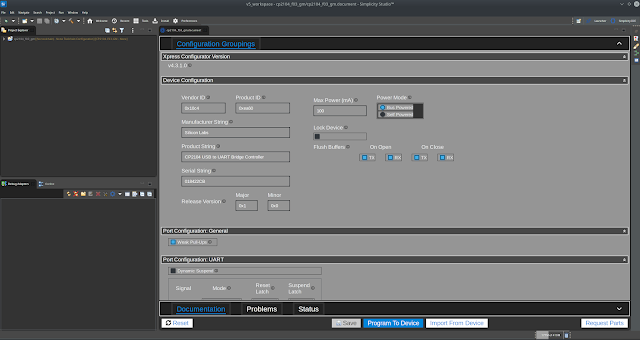
ここまでで問題がなければ CP2104 を繋ぐだけで問題なく認識されているはずです。画像では既に CP2104 が認識され Configuration 用画面を表示しています。
認識されていない場合は kernel driver を有効化するか、
https://www.silabs.com/developers/usb-to-uart-bridge-vcp-drivers
この辺から zip を落としてきて compile すれば認識はされると思います。
書き込みが失敗する
ここで問題発生です。おそらく特定の環境下では同じことが起こるはずなので記述しておきます。
cli で実行していると簡単に確認できますが、以下のエラーが表示され “Program To Device” が失敗します。
Traceback (most recent call last):
 File "${SIMPLICITY_HOME}/offline/ffd/xpress_configurator/Common/Snippet.py", line 346, in realCall
   func(obj, responseRef)
 File "${SIMPLICITY_HOME}/offline/ffd/xpress_configurator/cp210x_base/program.py", line 217, in OTPResponseHandler
   programDevice(obj)
 File "${SIMPLICITY_HOME}/offline/ffd/xpress_configurator/cp210x_base/program_utils.py", line 689, in programDevice
   enumerationError = resetDevice(obj, provisionModel)
 File "${SIMPLICITY_HOME}/offline/ffd/xpress_configurator/cp210x_base/program_utils.py", line 642, in resetDevice
   numDevices = getNumDevices(obj)
 File "${SIMPLICITY_HOME}/offline/ffd/xpress_configurator/cp210x_base/program_utils.py", line 78, in getNumDevices
   commandResponse = parseOutput(obj, configuration, output)[0]
TypeError: 'NoneType' object is unsubscriptable
この traceback から追っていくと呼び出している実行ファイルに辿り着きます。
def getConfigTool(obj):
   provisionModel = ffConf.getProvisionModel(obj.id)
   osName = getOs()
   configToolPath = provisionModel.commandInterface.getPath(osName)
   dump(configToolPath)
   if not configToolPath:
       raise RuntimeError("Unrecognized OS: {}! Cannot determine which programming utility to use!".format(osName))

   configProcess = subprocess.Popen([configToolPath], stdin=subprocess.PIPE, stdout=subprocess.PIPE, stderr=subprocess.PIPE)
   return configProcess
configToolPath は以下
${SIMPLICITY_HOME}/offline/ffd/xpress_configurator/cp210x_base/bin/Linux/cp210xcfg
$ ldd ${SIMPLICITY_HOME}/offline/ffd/xpress_configurator/cp210x_base/bin/Linux/cp210xcfg
       linux-gate.so.1 (0xf7edd000)
       libcp210xmanufacturing.so.1 => ${SIMPLICITY_HOME}/offline/ffd/xpress_configurator/cp210x_base/bin/Linux/libcp210xmanufacturing.so.1 (0xf7ec1000)
       libstdc++.so.6 => /usr/lib/gcc/x86_64-pc-linux-gnu/9.3.0/32/libstdc++.so.6 (0xf7c1d000)
       libgcc_s.so.1 => /usr/lib/gcc/x86_64-pc-linux-gnu/9.3.0/32/libgcc_s.so.1 (0xf7c00000)
       libc.so.6 => /lib/libc.so.6 (0xf7a1f000)
       libusb-1.0.so.0 => not found <= ここ
       libm.so.6 => /lib/libm.so.6 (0xf7954000)
       /lib/ld-linux.so.2 (0xf7ede000)
libusb-1.0.so.0 が not found
find ${SIMPLICITY_HOME}/ -name '*libusb*'
${SIMPLICITY_HOME}/offline/ffd/xpress_configurator/cp210x_base/bin/Mac/libusb-1.0.0.dylib
${SIMPLICITY_HOME}/developer/adapter_packs/inspect_usbxpress/libusb-1.0.so
${SIMPLICITY_HOME}/developer/adapter_packs/inspect_usbxpress/libusb-1.0.so.0.1.0
${SIMPLICITY_HOME}/developer/adapter_packs/inspect_usbxpress/libusb-1.0.so.0
${SIMPLICITY_HOME}/developer/adapter_packs/usb/libusb-1.0.so
${SIMPLICITY_HOME}/developer/adapter_packs/usb/libusb-1.0.so.0
${SIMPLICITY_HOME}/developer/adapter_packs/usb/libusb-1.0.so.0.1.0
この lib を ldd で解決されるようにしてみましたが、 64bit lib だと
${SIMPLICITY_HOME}/offline/ffd/xpress_configurator/cp210x_base/bin/Linux/cp210xcfg
${SIMPLICITY_HOME}/offline/ffd/xpress_configurator/cp210x_base/bin/Linux/cp210xcfg: error while loading shared libraries: libusb-1.0.so.0: wrong ELF class: ELFCLASS64
となります。これで原因はわかりました。
32bit Library を用意
SimplicityStudio で使用する libusb-1.0.so.0 は32bit で用意しないと実行できないようです。Gentoo では libusb-compat をインストールします。32bit にするために以下を実行します。
echo "dev-libs/libusb-compat abi_x86_32" >> /etc/portage/package.use/abi_x86_32

emerge -av dev-libs/libusb-compat

* IMPORTANT: 10 news items need reading for repository 'gentoo'.
* Use eselect news read to view new items.


These are the packages that would be merged, in order:

Calculating dependencies... done!
[ebuild   R    ] virtual/libintl-0-r2::gentoo  ABI_X86="32* (64) (-x32)" 0 KiB
[ebuild   R    ] app-arch/zstd-1.4.4-r4:0/1::gentoo  USE="threads -lz4 -static-libs" ABI_X86="32* (64) (-x32)" 1917 KiB
[ebuild   R    ] virtual/libcrypt-1-r1:0/1::gentoo  USE="static-libs" ABI_X86="32* (64) (-x32)" 0 KiB
[ebuild   R    ] sys-libs/db-5.3.28-r4:5.3::gentoo  USE="-cxx -doc -examples -java -tcl -test" ABI_X86="32* (64) (-x32)" 34268 KiB
[ebuild   R    ] sys-apps/attr-2.4.48-r4::gentoo  USE="nls (split-usr) -debug -static-libs" ABI_X86="32* (64) (-x32)" 0 KiB
[ebuild   R    ] dev-libs/libgpg-error-1.38::gentoo  USE="nls -common-lisp" ABI_X86="32* (64) (-x32)" 938 KiB
[ebuild   R    ] dev-libs/libgcrypt-1.8.6:0/20::gentoo  USE="-doc -o-flag-munging" ABI_X86="32* (64) (-x32)" 0 KiB
[ebuild   R    ] app-arch/lz4-1.9.2:0/r132::gentoo  USE="-static-libs" ABI_X86="32* (64) (-x32)" 299 KiB
[ebuild   R    ] sys-apps/util-linux-2.35.2::gentoo  USE="cramfs logger ncurses nls pam readline (split-usr) suid systemd udev unicode -audit -build -caps -cryptsetup -fdformat -hardlink -kill -python (-selinux) -slang -stat
ic-libs -su -test -tty-helpers" ABI_X86="32* (64) (-x32)" PYTHON_TARGETS="python3_7 -python3_6 -python3_8" 5030 KiB
[ebuild     U  ] sys-libs/pam-1.5.1::gentoo [1.4.0_p20200829-r1::gentoo] USE="berkdb filecaps pie (split-usr) -audit -debug -nis (-selinux)" ABI_X86="32* (64) (-x32)" 1382 KiB
[ebuild   R    ] sys-libs/libcap-2.43::gentoo  USE="pam (split-usr) -static-libs" ABI_X86="32* (64) (-x32)" 123 KiB
[ebuild   R    ] sys-apps/systemd-246.6:0/2::gentoo  USE="acl cgroup-hybrid gcrypt hwdb kmod lz4 pam pcre (policykit) resolvconf seccomp (split-usr) sysv-utils zstd -apparmor -audit -build -cryptsetup -curl -dns-over-tls -el
futils -gnuefi -homed -http -idn -importd -lzma -nat -pkcs11 -pwquality -qrcode -repart (-selinux) -static-libs -test -vanilla -xkb" ABI_X86="32* (64) (-x32)" 0 KiB
[ebuild   R    ] virtual/libudev-232-r3:0/1::gentoo  USE="(systemd) (-static-libs)" ABI_X86="32* (64) (-x32)" 0 KiB
[ebuild   R    ] dev-libs/libusb-1.0.23-r1:1::gentoo  USE="(split-usr) udev -debug -doc -examples (-static-libs) -test" ABI_X86="32* (64) (-x32)" 0 KiB
[ebuild   R    ] virtual/libusb-1-r2:1::gentoo  USE="udev" ABI_X86="32* (64) (-x32)" 0 KiB
[ebuild   R    ] dev-libs/libusb-compat-0.1.5-r2::gentoo  USE="(split-usr) -debug -examples -static-libs" ABI_X86="32* (64) (-x32)" 0 KiB
特に 32bit 環境は意識して構築していなかったので依存関係で色々入りますね。emerge が完了したら SimplicityStudio をリスタートします。
リスタート後はさきほどの cli 上のエラーも解消されてました。
08:37:48 programDeviceWithConfiguration: OUT:
CP210x_GetDeviceVid 00000000 { { 10c4 } }
CP210x_GetDevicePid 00000000 { { ea60 } }
CP210x_GetDeviceProductString 00000000 { { 43 00 50 00 32 00 31 00 30 00 34 00 20 00 55 00 53 00 42 00 20 00 74 00 6f 00 20 00 55 00 41 00 52 00 54 00 20 00 42 00 72 00 69 00 64 00 67 00 65 00 20 00 43 00 6f 00 6e 00 74 00 7
2 00 6f 00 6c 00 6c 00 65 00 72 00 } }
CP210x_GetDeviceSerialNumber 00000000 { { 30 00 31 00 38 00 34 00 32 00 32 00 43 00 42 00 } }
CP210x_GetSelfPower 00000000 { { 00000000 } }
CP210x_GetMaxPower 00000000 { { 32 } }
CP210x_GetDeviceVersion 00000000 { { 0100 } }
CP210x_GetDeviceManufacturerString 00000000 { { 53 00 69 00 6c 00 69 00 63 00 6f 00 6e 00 20 00 4c 00 61 00 62 00 73 00 } }
CP210x_GetLockValue 00000000 { { 00000000 } }
CP210x_GetPortConfig 00000000 { { f054 3fff 3fff 10 } }
CP210x_GetFlushBufferConfig 00000000 { { 00ff } }
08:37:48 parseOutput: [{'name': 'CP210x_GetDeviceVid', 'responses': [['10c4']], 'return': '00000000'}, {'name': 'CP210x_GetDevicePid', 'responses': [['ea60']], 'return': '00000000'}, {'name': 'CP210x_GetDeviceProductString',
'responses': [['43', '00', '50', '00', '32', '00', '31', '00', '30', '00', '34', '00', '20', '00', '55', '00', '53', '00', '42', '00', '20', '00', '74', '00', '6f', '00', '20', '00', '55', '00', '41', '00', '52', '00', '54'
, '00', '20', '00', '42', '00', '72', '00', '69', '00', '64', '00', '67', '00', '65', '00', '20', '00', '43', '00', '6f', '00', '6e', '00', '74', '00', '72', '00', '6f', '00', '6c', '00', '6c', '00', '65', '00', '72', '00']]
, 'return': '00000000'}, {'name': 'CP210x_GetDeviceSerialNumber', 'responses': [['30', '00', '31', '00', '38', '00', '34', '00', '32', '00', '32', '00', '43', '00', '42', '00']], 'return': '00000000'}, {'name': 'CP210x_GetSe
lfPower', 'responses': [['00000000']], 'return': '00000000'}, {'name': 'CP210x_GetMaxPower', 'responses': [['32']], 'return': '00000000'}, {'name': 'CP210x_GetDeviceVersion', 'responses': [['0100']], 'return': '00000000'}, {
'name': 'CP210x_GetDeviceManufacturerString', 'responses': [['53', '00', '69', '00', '6c', '00', '69', '00', '63', '00', '6f', '00', '6e', '00', '20', '00', '4c', '00', '61', '00', '62', '00', '73', '00']], 'return': '000000
00'}, {'name': 'CP210x_GetLockValue', 'responses': [['00000000']], 'return': '00000000'}, {'name': 'CP210x_GetPortConfig', 'responses': [['f054', '3fff', '3fff', '10']], 'return': '00000000'}, {'name': 'CP210x_GetFlushBuffer
Config', 'responses': [['00ff']], 'return': '00000000'}]
これは “Import From Device” の出力です。

GPIO.0 と GPIO.1 をそれぞれ “TX Toggle”, “RX Toggle” に変更して “Program To Device” を実行すると無事に CP2104 が TX/RX 信号で LED が反応するようになります。
22:32:57 programDeviceWithConfiguration: OUT:
CP210x_GetDeviceVid 00000000 { { 10c4 } }
CP210x_GetDevicePid 00000000 { { ea60 } }
CP210x_GetDeviceProductString 00000000 { { 43 00 50 00 32 00 31 00 30 00 34 00 20 00 55 00 53 00 42 00 20 00 74 00 6f 00 20 00 55 00 41 00 52 00 54 00 20 00 42 00 72 00 69 00 64 00 67 00 65 00 20 00 43 00 6f 00 6e 00 74 00 7
2 00 6f 00 6c 00 6c 00 65 00 72 00 } }
CP210x_GetDeviceSerialNumber 00000000 { { 30 00 31 00 38 00 34 00 32 00 32 00 43 00 46 00 } }
CP210x_GetSelfPower 00000000 { { 00000000 } }
CP210x_GetMaxPower 00000000 { { 32 } }
CP210x_GetDeviceVersion 00000000 { { 0100 } }
CP210x_GetDeviceManufacturerString 00000000 { { 53 00 69 00 6c 00 69 00 63 00 6f 00 6e 00 20 00 4c 00 61 00 62 00 73 00 } }
CP210x_GetLockValue 00000000 { { 00000000 } }
CP210x_GetPortConfig 00000000 { { f054 33ff 3fff 13 } }
CP210x_GetFlushBufferConfig 00000000 { { 00ff } }
22:32:57 parseOutput: [{'name': 'CP210x_GetDeviceVid', 'responses': [['10c4']], 'return': '00000000'}, {'name': 'CP210x_GetDevicePid', 'responses': [['ea60']], 'return': '00000000'}, {'name': 'CP210x_GetDeviceProductString',
'responses': [['43', '00', '50', '00', '32', '00', '31', '00', '30', '00', '34', '00', '20', '00', '55', '00', '53', '00', '42', '00', '20', '00', '74', '00', '6f', '00', '20', '00', '55', '00', '41', '00', '52', '00', '54'
, '00', '20', '00', '42', '00', '72', '00', '69', '00', '64', '00', '67', '00', '65', '00', '20', '00', '43', '00', '6f', '00', '6e', '00', '74', '00', '72', '00', '6f', '00', '6c', '00', '6c', '00', '65', '00', '72', '00']]
, 'return': '00000000'}, {'name': 'CP210x_GetDeviceSerialNumber', 'responses': [['30', '00', '31', '00', '38', '00', '34', '00', '32', '00', '32', '00', '43', '00', '46', '00']], 'return': '00000000'}, {'name': 'CP210x_GetSe
lfPower', 'responses': [['00000000']], 'return': '00000000'}, {'name': 'CP210x_GetMaxPower', 'responses': [['32']], 'return': '00000000'}, {'name': 'CP210x_GetDeviceVersion', 'responses': [['0100']], 'return': '00000000'}, {
'name': 'CP210x_GetDeviceManufacturerString', 'responses': [['53', '00', '69', '00', '6c', '00', '69', '00', '63', '00', '6f', '00', '6e', '00', '20', '00', '4c', '00', '61', '00', '62', '00', '73', '00']], 'return': '000000
00'}, {'name': 'CP210x_GetLockValue', 'responses': [['00000000']], 'return': '00000000'}, {'name': 'CP210x_GetPortConfig', 'responses': [['f054', '33ff', '3fff', '13']], 'return': '00000000'}, {'name': 'CP210x_GetFlushBuffer
Config', 'responses': [['00ff']], 'return': '00000000'}]
作成した基板の接続し忘れた 5V を Raspberry Pi 5V に接続する予定なので “Max Power(mA)” も 100mA => 500mA に変更しておきました。
以上です。